Install WordPress on Localhost
WordPress is the most widely used CMS when it comes to building websites and blogs.

If you are into web development industry, then chances are that you must have heard about WordPress already but I will give you some info just in case.
WordPress is a CMS which stands for Content Management System and it’s an Open Source CMS. The main object of using WordPress is to bootstrap development without putting a ton of money and make it easy to manage the content of the website. WordPress has a Theme Directory and Plugin Directory where you can find a variety of pre-built WordPress themes and WordPress plugins as well as widgets.
This is beginner’s guide to WordPress so you should already known followings:-
- How to create local server which is know as localhost (using XAMPP/LAMP/WAMP)
- You should know basic of PHP, HTML, CSS and JavaScript
(coding not required for this tutorial but it is recommended to have some experience in php before you start with any PHP CMS or framework ) - How to create a database using PhpMyAdmin
Downloading WordPress installer
First think you need to do to install WordPress is to download WordPress installer. You can download Installer by going to WordPress Download page or by clicking here. Current version of WordPress while writing this article is “Version 4.9.1”. It’s recommended to update WordPress frequently for security reasons.
Once you are done downloading, unzip the file and copy paste entire folder into htdocs or www (based on your version of server)
Installing WordPress on Localhost (XAMP/LAMPP/WAMPP)
Now it’s time to install. Firstly rename the folder to the desired name. For testing purpose, I am keeping the name “wordpress”. Do not include space or special characters except “-” or “_” .
Now open the following url on your browser – http://localhost/wordpress (change wordpress to folder name you have used). You will redirect to setup screen which will look like following screenshot-
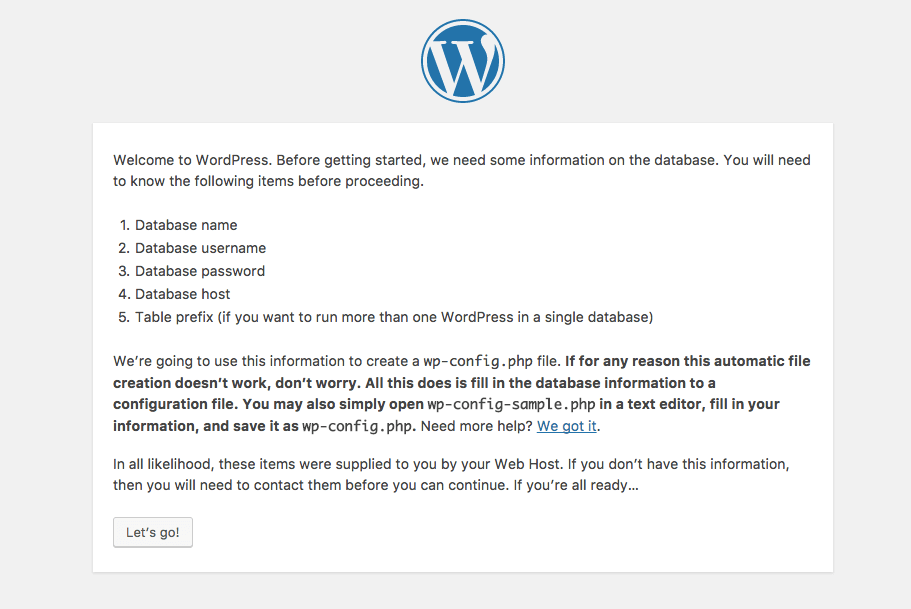
Click let’s go and you will be redirect to next step where you need to insert database connection details, the screen will look like following screenshot:-
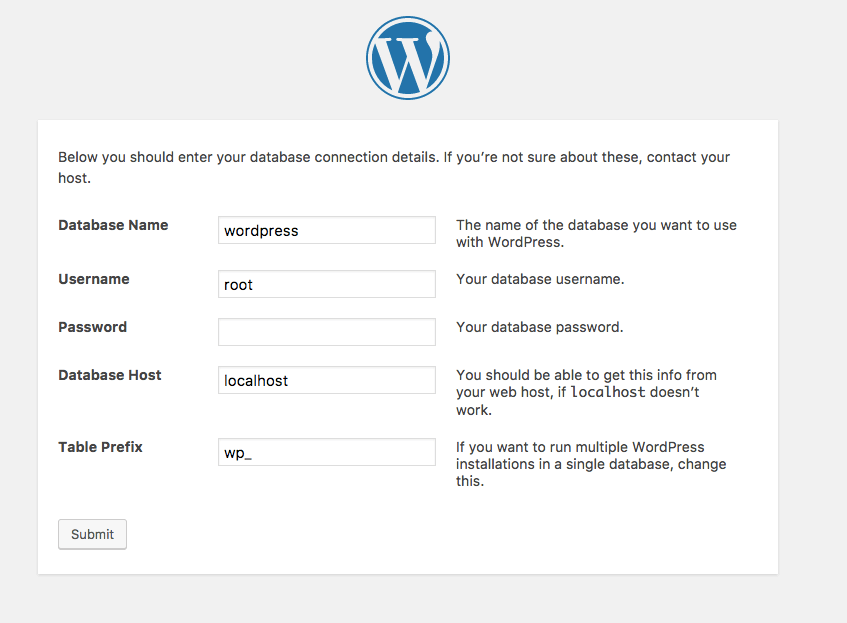
Database Name – insert your database name, if you haven’t created yet go to phpmyadmin and create one
Username – put username of database, most of the time it’s root in case of localhost (if you haven’t changed)
Password – it’s blank for localhost most of the times.
Database Host – it’s localhost for local server and most of the web server.
Table Prefix – you can keep this as it is for now I will explain it about this in another article later.
Now Click “Submit”
Now you will either get an error screen or a success screen. I always get error screen because I have localhost running on Macbook Air so I always need to change Wordpress folder permission from 755 to 777 like below
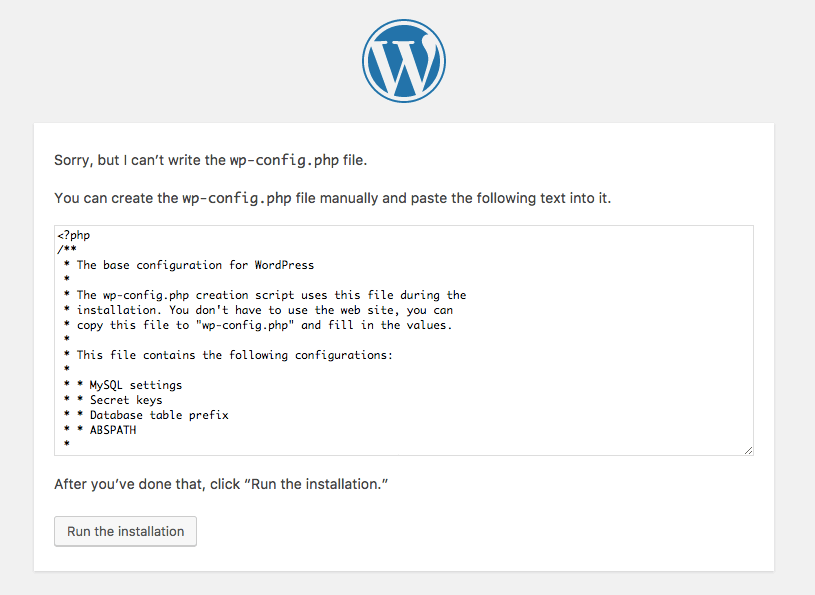
WordPress Database Error Screen
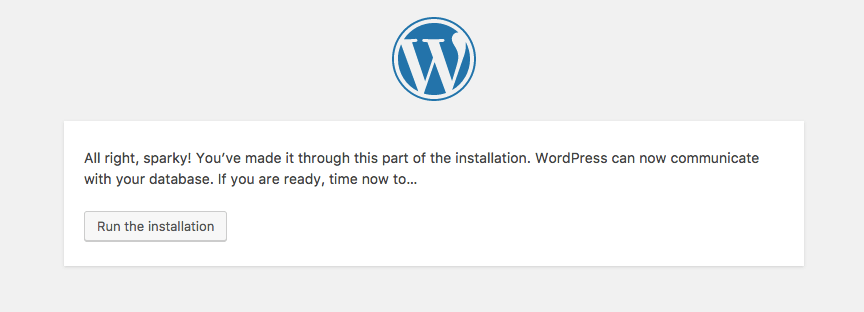
WordPress Database Success Screen
Below is the code I use (in the terminal/command line) to change permission, alternatively you can create a config.php file manually like instructed on error screen.
sudo chmod 777 /Applications/XAMPP/xamppfiles/htdocs/wordpressNote:- Make sure that all folder should have 755 permission and files should have 644 permission when uploading website to server else your website will be compromised.
Once you are on success screen click “Run the installation”
Configuring WordPress setup
Now WordPress script has been installed successfully and last step is needed to setup website information like the screen below –
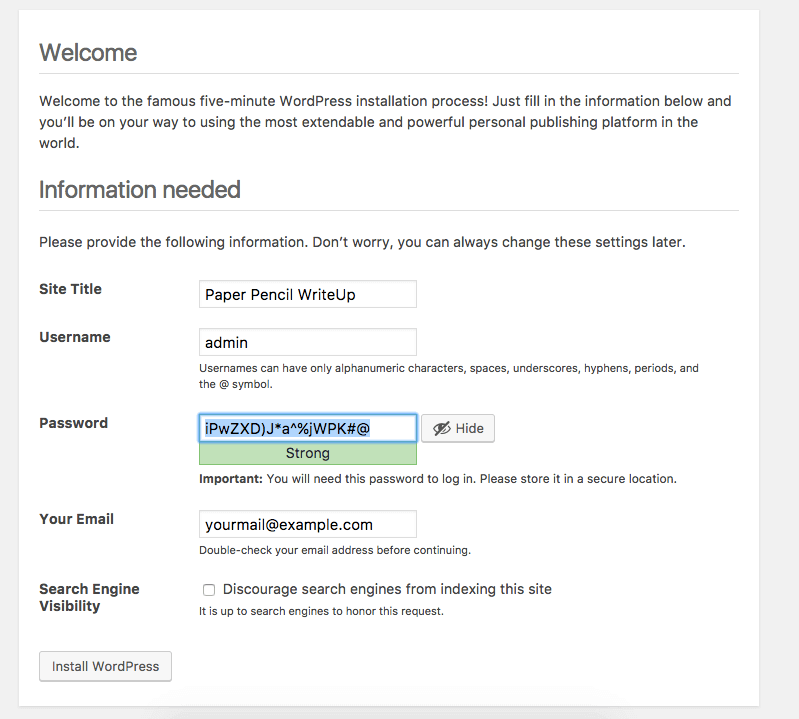
You need the website information and login details for backend (wp-admin).
Site Title – your website title
Username – username for backend login (not database username)
Password – password is auto generated just save it somewhere, alternatively you can change the password to desired password.
Your Email – your email for address notifications.
Search Engine Visibility – Keep this uncheck unless you want google to not index your website.
Click “Install WordPress” and we are done.
You can access your WordPress installation – http://localhost/wordpress and wp-admin (backend) – http://localhost/wordpress/wp-admin. (don’t forget to replace folder name)
Please take a moment and contribute to the developer community by sharing this article.